My site is named after a quilt block that caught my eye one day when I was surfing the web. I enjoy viewing craft blogs, and I'm particularily fond of quilting and paper-craft sites. I hope to chronicle my projects on this website and provide useful links to others who may want to try the same projects.
Saturday, August 27, 2011
Finished Quilted Table Runner
I was able to complete the table runner in my last post this week. I modified the technique quite a bit, but I ended up with a completed product that looks very similar.
Instead of sewing the strips directly to the back and batting, I pieced the strips together before I created the quilt sandwich. I used my walking foot to "stitch in the ditch" along each seam.
I used additional scraps to piece together the back of the runner. I created the binding from one of the fabrics I used on the front. I cheated and used my machine for all the sewing need to attach the binding.
I plan on bringing this runner to our cottage in the Finger Lakes. The blues will compliment the slip covers I have on the couch and chair in the living room.
Wednesday, August 24, 2011
Easy Quilted Table Runner

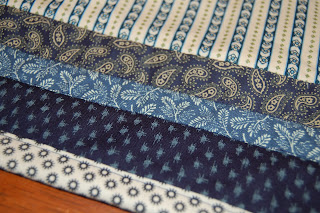
So, I've been admiring this tutorial for a while. I think the colors in the sample are fantastic. And the directions seem so easy to follow I keep coming back to the webpage to see it again. I have some blue and tan scraps in my sewing room left over from a large sampler quilt I made in a beginners quilting class this spring. I'm going to give it a shot!
http://www.diaryofaquilter.com/2010/08/table-runner-tutorial.html
Thursday, August 4, 2011
Quilted table runner
I think this was the first quilting project I attempted. I found a free pattern on the web and decided to make one for my mother-in-law for Mother's Day. I chose the colors to match the decor in her kitchen. I used a stitch-in-the-ditch technique to quilt the runner. I tried to used clear thread, but it kept on breaking. I ended up using black thread on the top and in the bottom.
The runner went together so quickly, I grabbed some scraps out of my fabric bin and made a second runner out of pink, green and cream fabric for my sister. You can find the pattern for this project by following this link: http://quiltbug.com/Free/table-topper.htm
Closet and laundry room makeover
So, my craftiness isn't limited to sewing and scrapbooking projects. I like to dabble in home improvement projects, too. My husband and I recently renovated a large closet and laundry room in our home. We replaced the subfloor and installed a new luxury vinyl tile floor. We grouted the tile and it looks wonderful.
We installed a custom closet organization system and fabricated a bench that spans one wall of the closet. I used the same fabric on the bench to sew a valance for the laundry room windows. We reused a white bookshelf and slid it underneath some of the wire shelving. The bookshelves house all my cookbooks and Wegman's Menu Magazines.
Over the bench we have two shelves with lots of canvas baskets. Each family member has their own basket to hold hats, gloves and scarves. The other baskets hold lightbulbs, cleaning supplies and our emergency lights. I found an old set of coat hooks in the basement that we screwed into the wall to hold our winter coats and rain jackets.
Now we have a highly functional storage space that is also attractive. We finally got our coats out of the kitchen. We no longer trip over shoes in the back hall. We love the way this project turned out!
Subscribe to:
Comments (Atom)


